Set Up Personal File Server
I've been running a personal file server for three years now, and it's become the backbone of my homelab. No more relying on cloud storage subscriptions, no more syncing delays, and complete control over who accesses what. In this guide, I'll walk you through building your own from bare metal or a small form-factor PC.
Why Build a Personal File Server?
When you self-host your file server, you eliminate monthly cloud subscription fees—typically $10–20 per person. More importantly, you own your data. There's no Terms of Service changing overnight, no corporate algorithm deciding what to do with your metadata, and no sharing your files with third-party AI training systems. I prefer handling this myself.
A personal file server also handles concurrent users better than cloud sync tools. When my partner and I both access the same project folders over Samba, we never hit the bandwidth throttling or conflict-resolution mess that Dropbox or OneDrive create.
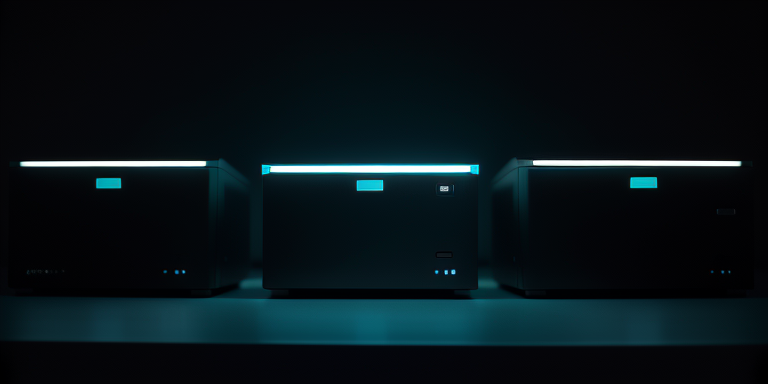
The hardware is cheap. An old Dell Optiplex with a few extra drives, a Raspberry Pi 5 with external USB storage, or even a small KVM VPS from RackNerd can run a file server. I prefer local hardware—no latency, no bandwidth fees.
Hardware Recommendations
For a home file server, you need storage and a CPU that can handle concurrent connections. I run an Intel i3 with 8GB RAM and four 4TB drives in RAID 6. That setup cost me about £400 used and handles a household of four people plus backups.
Minimum specs:
- CPU: Intel Celeron N5105 or better (fanless is nice)
- RAM: 8GB minimum, 16GB if you'll run Docker containers
- Storage: Start with at least two drives (RAID 1 for redundancy)
- Network: Gigabit Ethernet, ideally wired
If local hardware isn't viable, a small VPS can work. RackNerd's KVM VPS plans offer cheap, reliable infrastructure if you need off-site redundancy or public access.
Install Ubuntu Server and Prepare Storage
I use Ubuntu Server 24.04 LTS because it's stable, well-documented, and doesn't waste resources on a desktop environment. Here's the setup:
# After Ubuntu Server installation, update the system
sudo apt update && sudo apt upgrade -y

# Install essential tools
sudo apt install -y curl wget git htop mdadm lvm2

# Check available disks
lsblk

# Create a logical volume if using multiple drives
# First, initialize a physical volume on /dev/sdb
sudo pvcreate /dev/sdb /dev/sdc

# Create a volume group named 'storage'
sudo vgcreate storage /dev/sdb /dev/sdc

# Create a logical volume of 8TB
sudo lvcreate -L 8T -n files storage

# Format the LV as ext4
sudo mkfs.ext4 /dev/storage/files

# Create mount point and mount the volume
sudo mkdir -p /mnt/files
sudo mount /dev/storage/files /mnt/files

# Make it permanent by adding to /etc/fstab
echo '/dev/storage/files /mnt/files ext4 defaults,nofail 0 2' | sudo tee -a /etc/fstab

# Verify the mount
df -h
df -h before populating it with files. Mounting the wrong device is a common mistake.Install and Configure Samba
Samba is the standard for file sharing across Windows, macOS, and Linux. It's lightweight and proven. When I set up my server two years ago, I chose Samba over NFS because my household uses mixed operating systems.
# Install Samba
sudo apt install -y samba samba-utils

# Stop Samba during configuration
sudo systemctl stop smbd

# Backup the original config
sudo cp /etc/samba/smb.conf /etc/samba/smb.conf.backup

# Create the directory structure
sudo mkdir -p /mnt/files/shared /mnt/files/media /mnt/files/backups

# Set permissions (adjust user 'smbuser' as needed)
sudo chown -R smbuser:smbuser /mnt/files/shared /mnt/files/media
sudo chmod -R 755 /mnt/files/shared /mnt/files/media

# Create a new Samba config
sudo tee /etc/samba/smb.conf > /dev/null <
The configuration above creates three shares: shared (read-write for all users), media (read-only), and backups (restricted to backup processes). I prefer limiting write access where possible to reduce accidental deletion.
Create Samba Users and Set Passwords
Samba uses system users, so you need to create them first, then add them to Samba's password database:
# Create the main share user
sudo useradd -m -s /usr/sbin/nologin smbuser
sudo smbpasswd -a smbuser

# Create a backup user (for automated backup tools)
sudo useradd -m -s /usr/sbin/nologin backupuser
sudo smbpasswd -a backupuser

# Enable the users (required after creation)
sudo smbpasswd -e smbuser
sudo smbpasswd -e backupuser

# List Samba users
sudo pdbedit -L
ldappasswd if you scale beyond a few users.Access Your File Server from Windows, macOS, and Linux
Windows: Open File Explorer, type \\FILESERVER\shared in the address bar, and authenticate with your Samba username and password.
macOS: Open Finder, press Cmd+K, enter smb://FILESERVER/shared, and connect with the same credentials.
Linux: Mount it via the command line or file manager:
# Create mount point
mkdir -p ~/mnt/fileserver

# Mount the share
sudo mount -t cifs //FILESERVER/shared ~/mnt/fileserver -o username=smbuser,password=yourpassword,uid=$(id -u),gid=$(id -g)

# Permanent mount in /etc/fstab
# //FILESERVER/shared /home/user/mnt/fileserver cifs username=smbuser,password=yourpassword,uid=1000,gid=1000 0 0
Set Up Automated Backups with rsync
A file server without backups is a disaster waiting to happen. I run an external drive connected to another machine and sync everything nightly with rsync:
# On the backup machine, create a cron job
# Edit crontab
sudo crontab -e

# Add this line to back up every night at 2 AM
0 2 * * * rsync -av --delete /mnt/files/shared backup@FILESERVER:/mnt/files/backups/nightly-backup

# Or use a simple shell script if you want more control
sudo tee /usr/local/bin/backup-fileserver.sh > /dev/null <<'EOF'
#!/bin/bash
SOURCE="/mnt/files/shared"
DEST="/mnt/external-drive/backups"
LOG="/var/log/fileserver-backup.log"

rsync -av --delete "$SOURCE" "$DEST" >> "$LOG" 2>&1

if [ $? -eq 0 ]; then
    echo "[$(date)] Backup completed successfully" >> "$LOG"
else
    echo "[$(date)] Backup failed" >> "$LOG"
fi
EOF

sudo chmod +x /usr/local/bin/backup-fileserver.sh
Monitor Storage and Performance
I check disk usage weekly and set up alerts when capacity reaches 80%. Samba also logs connection issues, which helps debug client problems:
# Check storage usage
df -h /mnt/files

# Monitor Samba connections in real-time
smbstatus

# View recent Samba logs
tail -f /var/log/samba/log.smbd

# Check active shares
net share
Security Hardening
Even on a home network, basic security pays off. I restrict Samba to my local network and disable guest access:
# Edit /etc/samba/smb.conf and add these to [global]
# hosts allow = 192.168.1.0/24 127.0.0.1
# hosts deny = ALL

# Restart Samba
sudo systemctl restart smbd

# Check firewall rules (UFW)
sudo ufw allow from 192.168.1.0/24 to any port 445
sudo ufw allow from 192.168.1.0/24 to any port 139
If you need remote access, use a VPN (Wireguard or Tailscale) rather than exposing Samba to the internet directly. That's a hard rule in my setup.
Next Steps
You now have a working personal file server. Next, consider adding:
- Snapshots: Set up LVM snapshots or BTRFS for versioning.
- Redundancy: Add more drives and configure RAID or ZFS.
- Remote access: Deploy Tailscale for secure VPN access without exposing ports.
- Monitoring: Use Prometheus and Grafana to track disk I/O and network load.
A personal file server is one of the most practical homelab projects you can build. It pays for itself in months by eliminating cloud subscriptions, and you'll wonder how you ever lived without the performance and control.